Setting up Buddy Chat - Step 1: Data sources
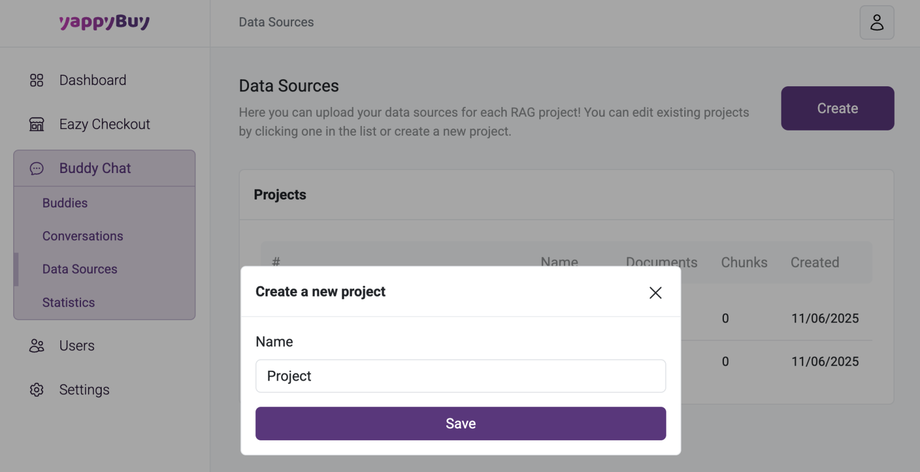
Go to "Data sources" in the navigation bar on the left.
Click on "Create". A window opens.
Enter a name for your project under "Name" and click on "Save".
Your project will now appear in the list under "Projects".
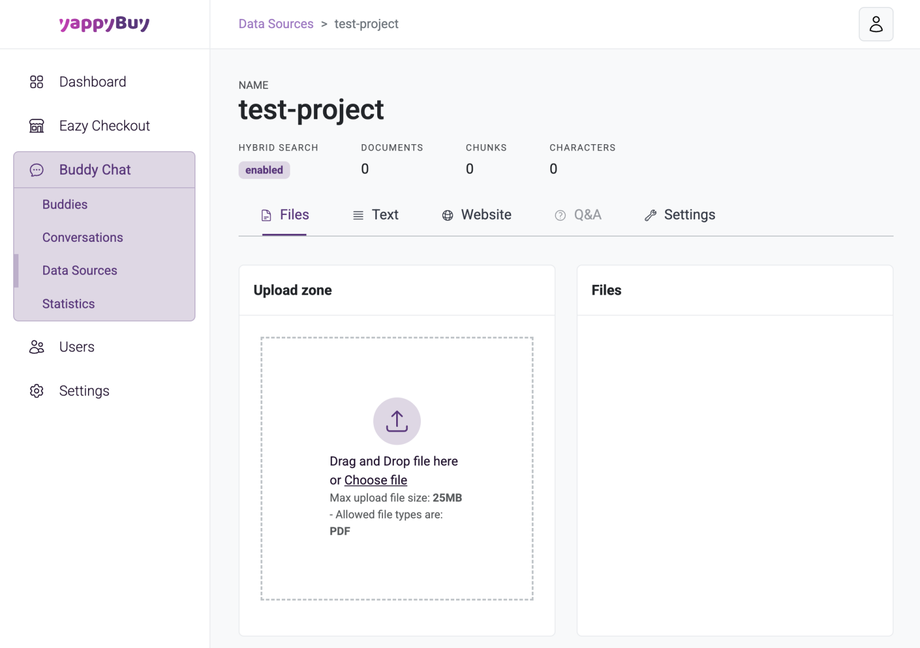
Click on your project and you can now set the following in the next window:
"Files": You can upload a pdf file (currently only PDF) here. These can be FAQs, contact details, a description of your business.
You should upload all files here that Buddy uses to provide the user with answers about your business. You can upload either one document or several. Please note which Buddy version you have purchased. This determines the number of pages you can upload here.
Under the "Text" tab you can enter additional text including a title.
This will be added to the document database.
In the next tab "Website" you can scrape your website or single HTML pages.
"Link zone": You can either scrape an entire website or the entire store or just a single page (HTML). Currently we have restrictions of max 1,000 pages.
Under "Data scrape mode" select an option to either "Scrape website" or alternatively "Scrape single website page".
In the field "Scrape Website URL" enter the URL of your website or store or the URL of the single page you want to scrape.
Then click on the "Fetch" button below.
Under the "Settings" tab, you can start re-indexing the data.
Only do this if you have uploaded new documents or deleted documents.
You can also delete the project.
Please note that this process cannot be undone.


